Tuesday, June 13, 2023
Saturday, October 20, 2018
Catching up!
Life has gotten in the way and all of a sudden you realize it's been over a year since you last posted! My wolf won in last year's fair. My daughter is taking lessons with me and she did win ribbons but we were still waiting on first place.
Well, this year she did it! She took first place in glass painting with her mermaid...her first ever painting. She also won ribbons in two other categories. So veryproud of her accomplishments! I was torn over my entry and decided to
Well, this year she did it! She took first place in glass painting with her mermaid...her first ever painting. She also won ribbons in two other categories. So veryproud of her accomplishments! I was torn over my entry and decided to Saturday, September 3, 2016
2016 Texas State Fair winners!
So excited to announce that Jasmine, my ocelot, has won first place in glass fusing. Paul Bratescu, a wonderful wildlife photographer, was kind enough to let me use his photograph taken in Costa Rica. My daisy bowl also won a first place in glass slumping. The pieces will be on exhibit in the Creative Arts Bldg during the entire run of the fair in October. Please come visit!
Thursday, June 2, 2016
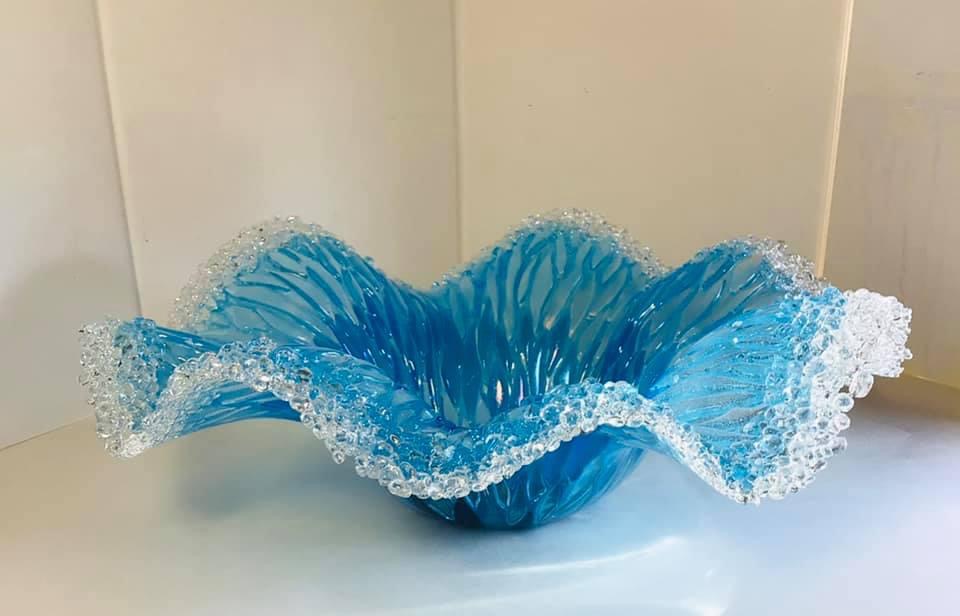
Pansy Bowl
Pansy bowl is a new creation using a Creative Paradise mold. The ladybug is an extra touch. I'm hoping to come up with a bowl that i feel worthy to be my entry in the Texas State Fair this year. They've added back the "slumping" category so fusers will have two categories in which to enter.
Tuesday, May 10, 2016
Saturday, March 19, 2016
Sunflower and Daisy bowls
I wanted to show you my newest creations. The mold is by Creative Paradise, GM88, a large organic slumper. Don't let my pictures be misleading as the bowls photograph to appear quite large. They actually measure about 3 1/2" deep and about 9" across. It takes time to develop a pattern that fits a mold and then experiments in firing to be sure it slumps correctly. This piece requires two firings. I'm still working to perfect it and once done, will consider writing a tutorial. I am photographing every step so i'm headed in that direction.
Wednesday, March 9, 2016
Iris
My love of iris continues. This iris photographs slightly blue but it's actually a lavender and white opal streaky. The lower petals were fused and the slumped on a Creative Paradise mold and the top, just as in the iris below, was draped over the top of a stainless cocktail shaker. I'll eventually have my bouquet of glass flowers for a basket.
Friday, February 19, 2016
Iris
Here is my iris in glass! I hope to do many more perfecting the coloration to be as realistic as possible. I was an avid iris grower several years back and at one time, i had 5 acres of over 500 varieties of tall bearded, hybrid irises. Tour buses would show up when i separated and sold bulbs. So, i should know my iris. For those of you that fuse glass, the bottom of this iris is done on a Creative Paradise mold. The top is my creation. The flower is attached to copper tubing which can be found at any home improvement type store. Stay tuned, more iris to follow and i'm also working on a glorious daffodil.
Saturday, February 6, 2016
Lillies
Flowers have always been my passion so here's my first attempt at fused glass lillies! This was done with a mold from Creative Paradise. Glass cut and flower first assembled as a glass round. Powder streaks done and yellow in throat then glass round fused to a tack fuse. Next, the flower round is placed on the mold and draped. The stamen are made of wire and the stem is copper tubing. My next project is to figure out orchids and irises.
Friday, December 11, 2015
Saturday, November 14, 2015
Warrior
This Indian was done one night as an experiment. Black powder just dusted on the glass and the figure quickly sketched in sgrafitto style. My plans were to put it back into the jar but i really liked his warrior look so i fired him. Eventually, i added the red as a "blood and suffering" touch and then framed him! Glass artists should try a quick sketch..sometimes it surprises you.
Wednesday, September 2, 2015
Tuesday, September 1, 2015
Tutorial Is Complete!
The tutorial for my lacy edged mosaic vases is finished, if you are interested, the tutorial can be found on my website, www.kittiesbylinda.com. It gives step-by-step instructions in how to cut, assemble, and fire the beautiful vases. I'm still waiting on the judging at the Texas State Fair...hoping my big white tiger is a winner!
Friday, August 28, 2015
New vases will be in my tutorial
I've been perfecting my vases and i'm now in the process of writing my second tutorial. It always involves more work than you plan on but hopefully it'll be out in a week. Here are examples of my series, FIRE, WATER, FORESTS, and SUN.
Wednesday, July 22, 2015
New work...
I've been a busy girl and have recently completed two pieces. The white tiger will probably be my entry for the Texas State Fair. I haven't decided on a frame for the gray wolf but I'm beginning to like him as is on this custom frame by Joe Sitton of Ironheart Forge...check out his FB page. While giving credits, I need to mention that the original photo of the wolf is the work of Paul Sherman, one of my fav wildlife photographers
Tuesday, June 16, 2015
Kitties by Linda fusing Tutorial
This past week i 've just about finished the kitten made as an example in the Kitties By Linda fusing tutorial group. Here's his progress pic. Eyebrows and whiskers will be added with the dremel, if you would like to buy the tutorial you can do so by going to www,kittiesbylinda.com.
Screamin eagle in progress..
Yesterday I received the custom stand made by Joe Sitton of Ironheart Forge. He has a FB page if you're interested. At any rate, i'm thrilled...it was a perfect fit. Now I can go ahead and add the finishing touches to eagle as i had set him aside until my stand arrived. Here's the progress pic.
Tuesday, May 26, 2015
Memorial Day
Well, i opened the kiln Memorial Day morning to find that my eagle ruffled his feathers and had a hand sized bubble in the lower left area. The pic here shows that on the left and the direct shot at the bottom of the group shows the elevation. I immediately went into rescue mode and the picture on the right shows him with his bubble repaired after another day in the kiln! There are several things about him that i'm frustrated with so he'll probable be dremeled and corrected and off to the kiln again
Sunday, May 24, 2015
Enamels on glass
A very good FB friend and fellow artist, Evelyn Baker, was kind enough to share some samples of Thompson enamels. I did some simple tests first...sifting some dry and then the same colors mixed with medium. I love the way they fire; very glossy and look like the glass. I don't like paints that fire opaquely and matte. If i'm doing glass, i want it to look like glass! Lol. So yesterday i decided to do a sifted piece with roses since i loved the pinks. This is simply sifted dry enamels fused to 1400 degrees. Maybe later I'll slump it into a shallow bowl or plate.
Subscribe to:
Posts (Atom)